Amazon requires eligible Brand Registry sellers to build enhanced product pages through A+ Content Manager, and every submission lives or dies on module limits, file specs, and a strict list of content prohibitions. Skip a rule on promotional language, review quotes, or brand linkage and the whole submission bounces back. Get eligibility, module choice, and mobile readability right the first time, and Amazon’s own numbers show real upside waiting on the other side.
What Do Amazon A+ Content Guidelines Actually Require?
Before a designer opens a template, confirm the boring stuff. Most rejected A+ submissions fail for reasons that have nothing to do with creative quality and everything to do with skipped prep work.
Run through this before assigning creative work:
Pro Tip: Build a shared “asset ledger” spreadsheet that tracks rights status, file dimensions, and ASIN assignment for every image before design work starts. It costs an hour up front and saves a week of resubmission cycles later.
Who Is Eligible for A+ Content and Where Do You Access It?
A+ Content Manager sits behind Brand Registry, not behind the standard Seller Central menu everyone already knows. You need a Professional selling plan, and you need either brand ownership or an assigned Brand Representative or Reseller role tied to that specific brand.
Some generic, unbranded ASINs get limited access to Basic A+ features even without full registry enrollment, but Premium A+ eligibility only shows up once Amazon confirms your brand’s standing inside A+ Content Manager itself. That’s the real source of truth. Don’t trust a spreadsheet from last quarter.
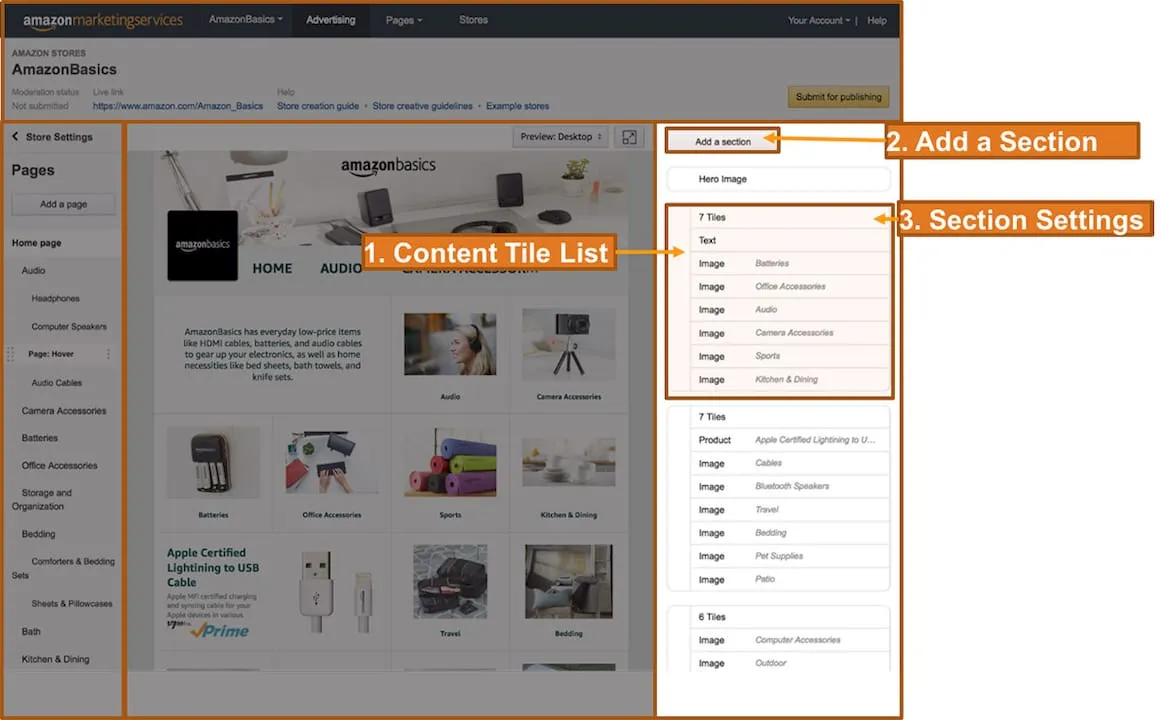
To get there: open Seller Central, go to Advertising, select A+ Content Manager, then click Start creating A+ Content. From there you build the module layout first and apply ASINs afterward, targeting the exact SKUs you want the content to appear on.
Before you upload anything, double check:
Enrollment problems are the single most common reason a marketing team builds a full module set and then can’t submit it. Confirm access on day one, not after the creative is finished.
What Are the Module Types and Limits for Basic vs. Premium A+?
Amazon splits enhanced content into two tiers, and the gap between them is bigger than most teams assume. Basic A+ Content covers standard text blocks, static images, and comparison charts, capped at five modules per ASIN. Premium A+ adds video, interactive hotspots, image carousels, and enhanced comparison tables, with room for up to seven modules.

Brand Story is a separate element entirely. It runs across your catalog rather than a single listing, giving shoppers a consistent brand introduction no matter which product page they land on.
The tier gap isn’t just cosmetic. Amazon reports that Basic A+ Content can lift sales by up to 8%, while Premium A+ can push that lift as high as 20%. That’s roughly two and a half times the impact, which makes a strong case for Premium on any ASIN doing meaningful volume.
With only five or seven module slots to work with, sequencing matters more than volume. A workable structure:
Premium’s extra slots and interactive features justify the added production cost mainly on higher-velocity ASINs or hero products, where the conversion lift compounds against real traffic. On a slow-moving SKU, Basic often covers the job for a fraction of the creative spend.
What Are the Image Specs and File Requirements for A+ Content?
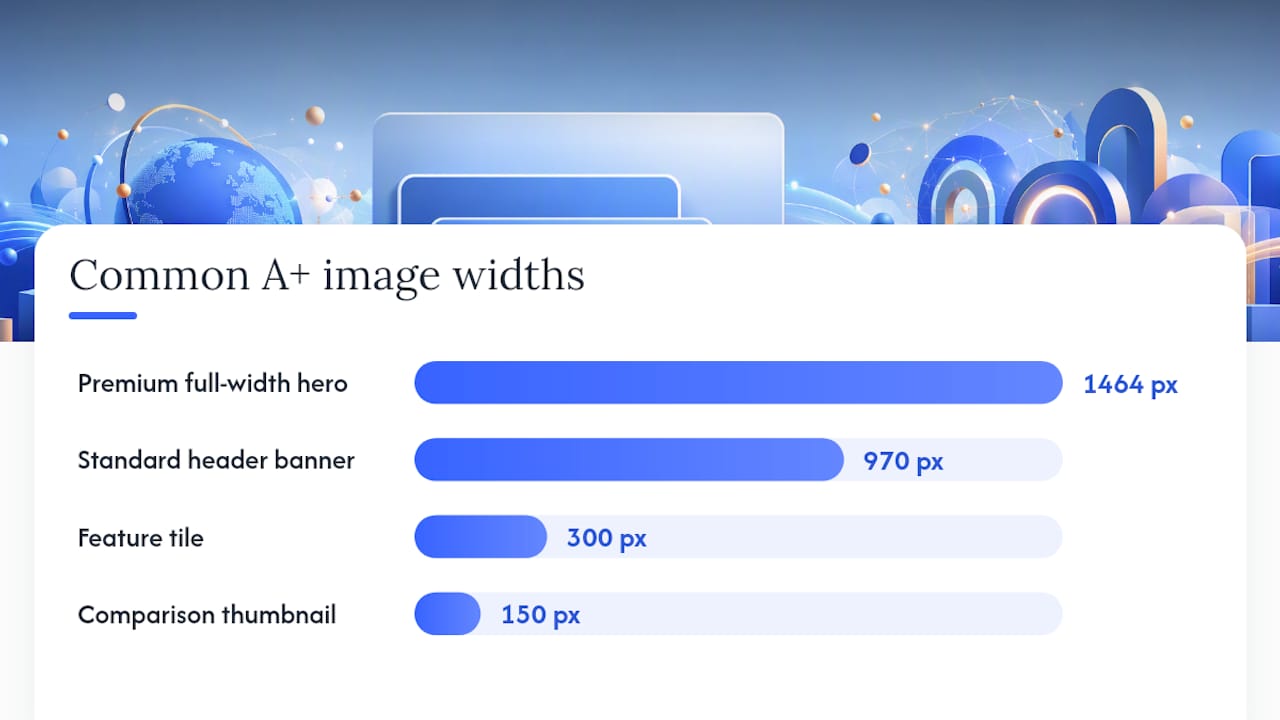
Working dimensions vary by module, and Amazon updates them without much fanfare, so treat any number here as a planning baseline, not gospel. Confirm the exact requirement inside A+ Content Manager before final export.
That said, these figures come up constantly in creative briefs:
Many modules cap image files at 2 MB, so export optimized files rather than dumping raw camera output straight into the uploader. A 40 MB TIFF file will bounce every time, regardless of how good the photography is.
Pro Tip: Design at a higher resolution than the minimum, then downscale on export. Upscaling a low-res image to hit a module’s dimensions almost always introduces visible blur that reviewers, and shoppers, will notice.
Mobile is where most A+ content actually gets seen, and it’s also where most of it quietly fails. Modules stack and compress differently on a phone than they do in the desktop editor, so test at three widths: thumbnail size, phone width, and the live product detail page. Small embedded text that reads fine on a 27 inch monitor turns into an unreadable smear on a five inch screen. Leave a generous safe zone around any text or logo so nothing gets clipped in the crop.
On rights: confirm every user-generated image explicitly clears Amazon as a usage surface, not just “social media” or “marketing use.” Strip watermarks, handles, and platform logos from the file itself before it goes anywhere near a module. Realistic, well-lit imagery also does more work than most brands expect. High-fidelity product visuals that show true color and texture consistently outperform over-processed or filtered shots once they’re competing for attention next to text blocks.
What Content Gets A+ Submissions Rejected?
Amazon’s moderation rules are stricter than most brands assume, and a single violation can sink an entire submission, not just the offending module. Know these before a designer touches a template.
Prohibited outright:
Pro Tip: Assign one editor to read every text field out loud before submission. Typos that slip past a silent read are almost always caught when someone has to say the sentence.
Most of these show up because a marketing team recycles ad creative straight into A+ modules without stripping the sales language out first. An A+ page is closer to packaging copy than an ad. Write it that way.
How Do You Create, Preview, and Submit A+ Content for Approval?
The workflow inside A+ Content Manager follows a fixed sequence, and skipping the preview step is the fastest way to end up resubmitting.
Build in a buffer before any launch date. Review timelines shift, and a resubmission cycle can add several more days on top of the original wait.
What Are Nectar’s Best Practices for A+ Content Strategy?
Amazon’s rulebook tells you what’s forbidden. It doesn’t tell you how to sequence a story inside five or seven modules, which is where most brands actually struggle.
Nectar’s production teams lean on a version of the hook, features, usage, proof, and brand map, then compress ruthlessly to fit the module count available. If a claim doesn’t survive being read on a five-inch screen in two seconds, it doesn’t belong in the module. Save nuance for the product description field, not the hero image.
On UGC: clear Amazon-specific usage rights during the creator briefing stage, not after the content is already shot. Retroactively chasing rights clearance is the single most common reason a launch date slips. Choose UGC assets that hold up under aggressive cropping, since a module will compress an image regardless of how it looked in the original post.
On measurement: track detail page conversion rate and unit sales per detail page before and after A+ content goes live, and A/B test module order where volume supports it. Coordinating A+ launches with Sponsored Ads campaigns accelerates the data you get back, since paid traffic reaches statistical significance faster than organic alone.
Pro Tip: Keep rights documentation, creative files, and product data in one shared ledger before production starts. Split across three systems, and someone always finds out too late that a hero image’s usage rights never covered Amazon.
Comparison charts deserve their own attention here too. Used well, they cross-sell effectively across a catalog instead of just listing specs nobody reads.
What Should You Fix First When A+ Content Gets Rejected?
Rejection notes are terse, and matching them to the right fix saves a resubmission cycle. Four causes account for most rejections.
If the rejection reason is vague or the fix isn’t obvious from the note, open a Seller Support ticket rather than guessing through multiple resubmissions. If the reason is specific and the fix is mechanical, correct it and resubmit directly. Guessing wastes review cycles you don’t get back.
Why Most A+ Rejections Are a Process Problem, Not a Creative One
After reviewing how brands actually build these pages, one pattern stands out: the content that gets rejected almost never fails because the design is weak. It fails because rights weren’t cleared before the shoot, because nobody checked ASIN linkage before uploading, or because a marketing team recycled ad copy that was never meant to sit on a product detail page.
The brands that consistently get approved on the first pass treat A+ content as a compliance workflow with a creative layer on top, not the other way around. They lock eligibility and rights before a designer opens a file. They preview on an actual phone, not just the desktop simulator. That discipline is unglamorous, and it’s also the entire difference between a two-day approval and a two-week fight with Seller Support.
Brands that outsource this to a team running dozens of these submissions a month tend to avoid the expensive mistakes: the reshoot because rights didn’t cover Amazon, the rebuild because text got baked into an image instead of a text field. That’s not a knock on internal marketing teams. It’s a reflection of how unforgiving Amazon’s moderation actually is once you’ve seen it reject the same three mistakes for the hundredth time.
How Nectar Handles A+ Content Production End to End
Nectar’s creative studio runs A+ production as one connected process instead of scattered handoffs between photographers, designers, and legal review. Photography, video, and design come from an in-house team that already knows Amazon’s module specs cold, rights clearance happens before assets are shot rather than after, and ASIN mapping gets checked against Brand Registry records before anything reaches A+ Content Manager.

The result brand teams care about most: fewer rejected submissions, faster approval turnaround, and creative that’s built to convert rather than just built to pass review. Nectar’s iDerive analytics platform then tracks how each module performs against detail page conversion, so the next round of A+ content gets built on real data instead of a guess about what worked last time.
If your team is stuck waiting on internal design bandwidth, chasing UGC rights clearance, or resubmitting the same module for the third time, that’s usually the sign an agency workflow pays for itself fast. Check out Nectar’s full services to see how managed A+ production fits into a broader Amazon growth plan.
Sources
Recommended
.png)