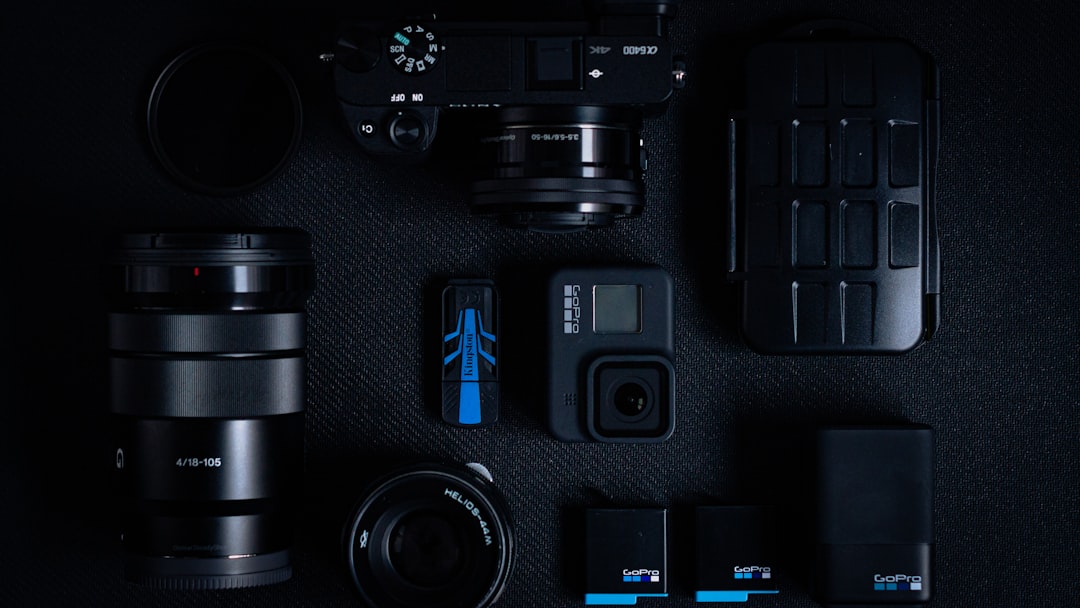
Yes — with a modest kit and a repeatable workflow, beginners can produce professional-quality product photos that increase ecommerce sales. You do not need a studio or a $3,000 camera. What you need is soft light, a consistent setup, and the right angles for every SKU.
Before your first shoot, run through this checklist:
-
Clean the product thoroughly (fingerprints and dust read clearly on camera)
-
Choose a white or neutral background that matches your primary marketplace
-
Set up one diffused light source (window or LED panel) at a 45-degree angle
-
Lock your camera or phone on a tripod
-
Prepare a shot list: hero, detail, scale, and at least one lifestyle image
-
Check your export specs before you start (Amazon, Shopify, and Etsy each have different requirements)
Three priorities drive everything else: lighting (soft and consistent), consistency (same framing, same white balance across every SKU), and adequate angles (hero plus detail plus scale, minimum). Get those three right and your images will outperform most of what is already on the marketplace.

Why does product photography matter for your ecommerce sales?
Product photography is the system that translates a physical object into a buying decision. On any ecommerce channel, the image does the job a store shelf used to do: it communicates quality, scale, texture, and trust in under a second.
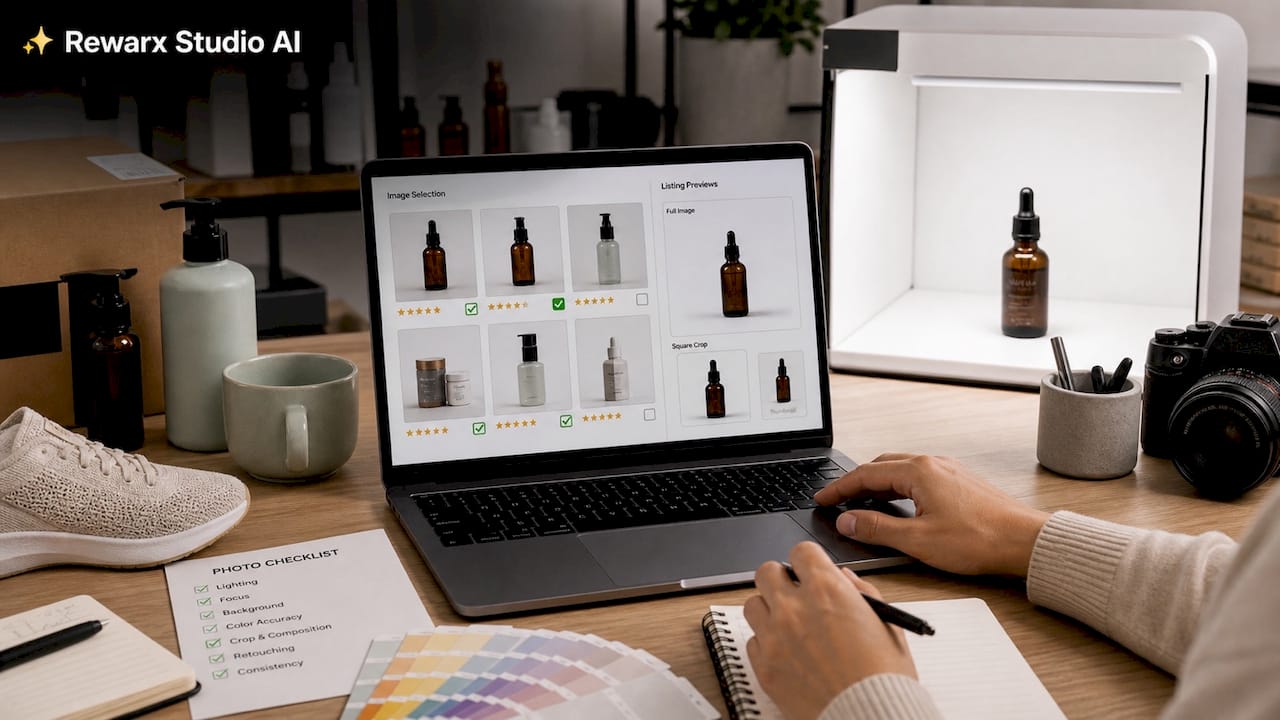
The business stakes are concrete. Listings with high-quality images convert 22–30% higher than those with low-resolution or poorly lit photos. That gap shows up in ad performance too: a better hero image lowers your cost-per-click because the click-through rate improves before a shopper ever reads your title or price.
Returns are the other side of the equation. When images misrepresent color, texture, or scale, customers return the product. Accurate photography sets the right expectation before purchase, which keeps return rates down and review scores up.
The difference between ad-hoc snapshots and a systemized approach comes down to one document: an image brief. A brief that defines shot types, lighting standard, export profile, and banned props dramatically improves catalog consistency across every SKU you add. Without one, each product gets photographed slightly differently, and your storefront looks like a patchwork instead of a brand.
-
Conversion lift: 22–30% higher for quality images vs. poor ones
-
Lower return rates when images accurately represent color, texture, and scale
-
Better ad CTR from a stronger hero image
-
Brand cohesion when every SKU follows the same visual standard
What shot types does every product listing need?
Shot type selection is where most beginners leave money on the table. A single hero image is not enough. Products that display five or more image types convert at roughly 2.3 times the rate of listings with one or two images.
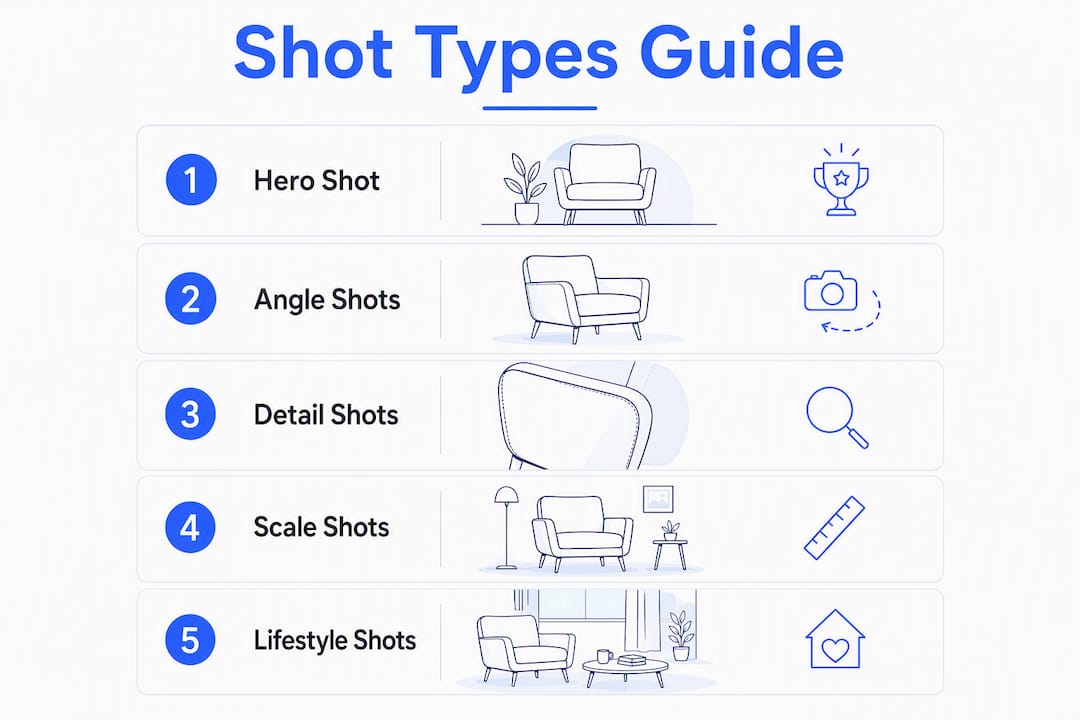
Hero shot
The front-facing, clean-background image that leads every listing. This is your primary conversion asset. For Amazon it must be on pure white; for Shopify and Etsy it should be your most polished, well-lit angle. Fill most of the frame with the product.
45-degree and angle shots
A three-quarter view that shows depth and dimension. For most products, one or two angle shots answer the “what does the back look like?” question that kills conversions when left unanswered.
Detail and macro shots
Close-ups of texture, stitching, hardware, or finish. These matter most for jewelry, apparel, leather goods, and electronics. A shopper who cannot see the fabric weave or the connector port is a shopper who hesitates.
Scale and in-hand shots
Show the product next to a common reference object or held in a hand. Furniture, bags, and kitchen tools all suffer from scale ambiguity. One in-hand shot removes it entirely.
Lifestyle shots
The product in use, in context. Lifestyle images belong in secondary image slots and in social ads. They answer “how does this fit into my life?” rather than “what does this look like?”
360-degree and spin shots
A sequence of 24–36 frames that lets shoppers rotate the product on the page, a technique described in detail in Video Marketing for Ecommerce that helps complement still photography with motion to boost sales. High-consideration categories like footwear, electronics, and furniture benefit most. A turntable and a consistent lighting setup are all you need to capture the frames.
Packaging shots
Show the box, bag, or insert. For gift-oriented products, the unboxing experience is part of the value proposition. Packaging shots also reduce “not as described” complaints.
Minimum recommended shot sets by product tier:
-
Starter (under $25): hero, one angle, one detail, one scale reference
-
Mid-range ($25–$75): hero, two angles, two details, one scale, one lifestyle
-
High-consideration (over $75): full set of five-plus image types, plus 360 if feasible
What gear do you actually need for product photography?
The honest answer: less than you think. A functional home setup can cost as little as $47, and smartphone-based kits produce images that are genuinely good enough for most ecommerce listings. The camera is rarely the bottleneck. Light is.
Starter tier: phone-based setup ($50–$100)
-
Smartphone (iPhone 13+, Samsung S22+, or Pixel 6+ all exceed ecommerce resolution requirements)
-
Phone tripod ($10–$20)
-
White poster board or foam core for background ($3–$5)
-
Sheer white curtain or translucent shower curtain as a window diffuser (free or under $10)
-
White foam board as a fill reflector ($3)
Mid-range tier: entry mirrorless or DSLR ($150–$350 total)
-
Sony A6000-series mirrorless or equivalent entry DSLR (used, around $300–$400 for the body)
-
50mm f/1.8 prime lens or a kit 18–55mm lens
-
Two LED panel lights or a softbox kit ($80–$150)
-
Full-size tripod with ball head ($50–$100)
-
Seamless paper sweep roll and stand ($40–$70)
-
5-in-1 reflector kit ($15–$25)
-
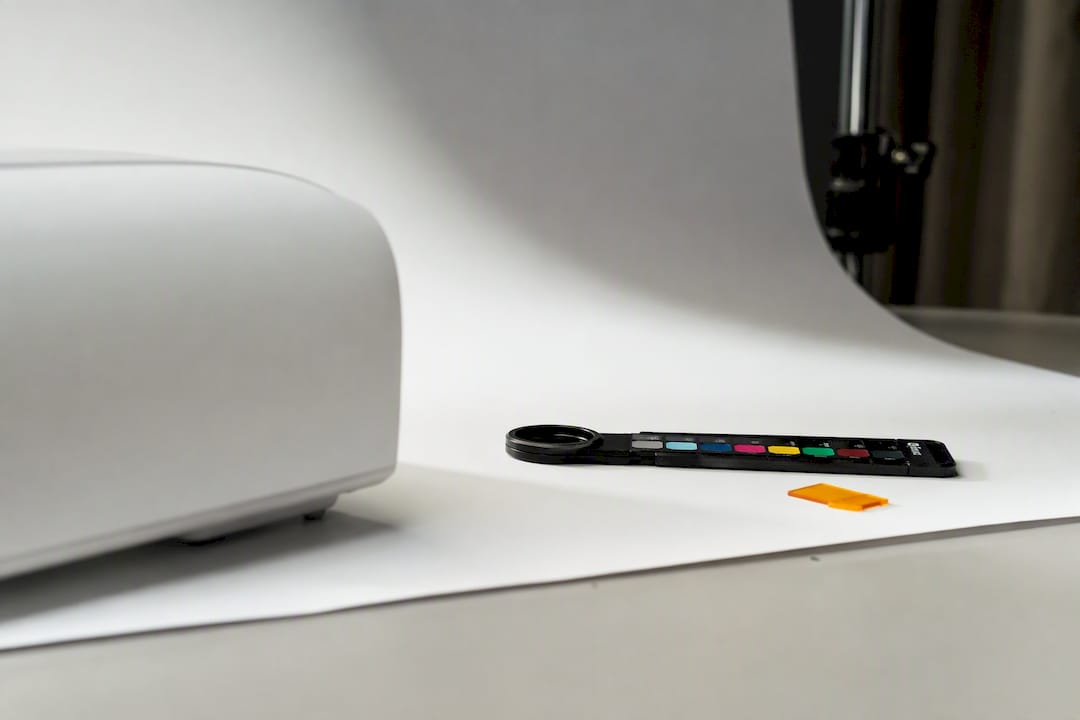
Remote shutter release and color card ($10–$20)
Small studio tier ($400–$700+)
-
Mirrorless body with a dedicated macro or 90mm lens for detail shots
-
Two strobe monolights with softboxes
-
Tethering cable and software (Capture One or Lightroom tethered capture)
-
Acrylic reflection board for premium-feel surface shots
-
X-Rite ColorChecker Passport for color calibration
-
Turntable for 360 shots
How to prioritize purchases: buy lights before a new camera body, every time. A well-lit phone photo outperforms a poorly lit DSLR shot. After lighting, invest in stabilization (tripod), then calibration tools (color card, ColorChecker).
How do you set up lighting that actually looks professional?
Lighting is the single biggest quality driver in product photography, more than camera body, more than lens, more than editing. Two softboxes or diffused window light consistently outperform harsh direct flash. The goal is soft, daylight-balanced light that wraps around the product without creating hard shadows or hot spots.
One critical rule before anything else: never mix light sources. Daylight from a window plus overhead fluorescent creates two different color temperatures in the same frame. The result is a color cast that is nearly impossible to fix cleanly in post.
One-light setup (window or LED)
-
Place the product on a white surface against a white background.
-
Position your light source (window or LED panel) at a 45-degree angle to the product, slightly above product height.
-
Place a white foam board or reflector on the opposite side, about 12–18 inches from the product, to bounce light back into the shadow side.
-
Adjust the light distance until shadows are soft but the product still has visible dimension. Closer light = softer shadow; farther light = harder shadow.
-
Block any other ambient light sources (close blinds, turn off overhead lights).
Two-light setup
-
Set your key light at 45 degrees to one side, slightly above.
-
Set a second, dimmer fill light at 45 degrees on the opposite side, or use a reflector instead of a second light.
-
Keep the fill at roughly half the intensity of the key to preserve dimension without flattening the product.
-
Check for reflections on shiny surfaces by moving the lights slightly until the reflection falls outside the product’s visible face.
DIY diffusion options
A piece of white ripstop nylon or a translucent shower curtain taped over a window works as well as a $60 diffusion panel. For a DIY softbox, stretch white fabric over a wire frame and place an LED bulb behind it. The material cost is under $15.
Pro Tip: Lock your white balance before you shoot the first frame, then never touch it again during that session. Shoot a gray card or a white sheet of paper, set a custom white balance in-camera, and save it. Take one “reference frame” with a ColorChecker or color card at the start of each batch so your editor can match every image in post without guessing.
What camera settings give you sharp, well-exposed product shots?
Sharp, accurate exposure is the foundation of every usable product image. The settings below are not suggestions — they are the starting point for nearly every product shoot, phone or camera.
Phone settings (step by step)
-
Open the native camera app and tap the product to lock focus and exposure. On iPhone, tap and hold to lock both (AE/AF Lock appears).
-
Turn off flash entirely. On-camera flash creates harsh shadows and blows out highlights.
-
Turn off HDR. HDR processing blends multiple exposures and can create halos around product edges.
-
Shoot in RAW or HEIF if your phone supports it (iPhone ProRAW, Samsung Expert RAW). More data to work with in editing.
-
Use 2x optical zoom if your phone has it. Never use digital zoom — it degrades resolution.
-
Use a tripod and a self-timer or Bluetooth shutter release to eliminate camera shake.
Mirrorless and DSLR sample settings
-
Set the mode dial to Manual (M).
-
Aperture: f/8–f/11 for maximum depth of field across the product. Avoid f/16 or smaller — diffraction softens the image.
-
ISO: 100–200. Keep it as low as possible to minimize noise.
-
Shutter speed: adjust to achieve correct exposure given your lighting. With continuous LEDs, 1/60–1/125 is typical. With strobes, sync at 1/160 or your camera’s sync speed.
-
White balance: set a custom white balance from a gray card, or use the Kelvin setting (5500K for daylight-balanced LEDs).
-
Shoot RAW. Always.
On-the-spot quality checks
-
Zoom into the thumbnail on your camera’s LCD to check sharpness at 100%. If the product edge is not crisp, check focus, aperture, and whether the tripod moved.
-
Check the histogram. You want the exposure to sit in the right two-thirds of the graph without clipping the highlights (no spike at the far right).
-
Compare the color card in the frame to the physical product. If the white looks warm or cool, adjust white balance before continuing.
Tethering connects your camera to a laptop via USB so every shot appears on a large screen in real time. Capture One and Lightroom both support tethered capture. For a catalog shoot with dozens of SKUs, tethering catches focus misses and color shifts immediately instead of after the shoot wraps.
How do you compose shots and keep your catalog visually consistent?
Composition and brand consistency are two separate problems that need to be solved together. A beautifully composed single shot means nothing if the next product in your catalog looks like it came from a different brand.
Composition basics
-
Fill the frame for thumbnails. On a marketplace grid, small thumbnails compete for attention. A product that fills 85–90% of the frame reads larger and more confident than one floating in white space.
-
Rule of thirds for lifestyle shots. Place the product at one of the four intersection points of a 3x3 grid overlay. This creates visual tension that draws the eye.
-
Standard angles for every SKU. Front, 45-degree, and top-down are the three angles that should appear in every listing. Add back and side views for apparel and bags.
Brand consistency checklist
-
Same white balance setting across every SKU in the catalog
-
Same product scale in-frame (a mug should occupy the same proportion of the frame in every mug listing)
-
Same lighting direction and shadow style
-
Same background and surface material
-
Same aspect ratio for export (1:1 for Instagram, 4:5 for Amazon, 16:9 for banner ads)
Styling tips
Props should support the product without competing with it. A candle next to a small plant is context. A candle surrounded by five props, a book, a coffee cup, and a throw blanket is clutter. One or two supporting elements maximum. Color palettes for props should either match the product’s color family or stay neutral (white, cream, natural wood).
For apparel and soft goods, the choice between a model, a mannequin, and a flat lay affects perceived value. Models convert better for fashion items above $40. Flat lays work for accessories and folded items. Ghost mannequin (invisible mannequin post-processing) gives shape without a visible model, which is useful for Amazon’s no-visible-mannequin rule.
Pro Tip: Build a one-page image brief for every product line. List the mandatory shots, the lighting settings (Kelvin value, light distance, reflector position), the export specs, and any banned props. Share it with anyone who touches the camera. This single document is what separates a consistent catalog from a patchwork one, and it scales to any team size.
Which backgrounds and surfaces work best for your products?
Background choice is a strategic decision, not just an aesthetic one. The wrong background gets your listing rejected on Amazon. The right one can add perceived value without a single word of copy.
When to use pure white
Pure white (RGB 255, 255, 255) is required for Amazon main images and recommended for Shopify primary product listings. It isolates the product, matches every marketplace requirement, and simplifies background removal in post. If you sell on Amazon, shoot on white first, always.
When to use neutral or textured backgrounds
Neutral gray, warm cream, or textured surfaces (wood, linen, slate) work for D2C brand storytelling and social content. A boutique or handmade brand that uses pure white everywhere can actually hurt its brand perception on its own site, where the clinical look undercuts the handcrafted positioning. Use white for marketplace compliance and textured or contextual backgrounds for your own storefront and social channels.
Surface choices and what they communicate
-
Reflective acrylic: premium feel, works well for cosmetics, jewelry, and tech accessories. Creates a natural reflection that adds depth.
-
Natural wood: warmth and craft. Ideal for food, home goods, and handmade products.
-
White linen or fabric: soft and lifestyle-oriented. Works for apparel, skincare, and wellness products.
-
Marble or stone tile: clean and modern. Popular for beauty and kitchen products.
How to build a white sweep for under $30
-
Buy a roll of white seamless paper ($15–$25 at any photography or art supply store) or use a large sheet of white foam core.
-
Tape or clamp the top edge to a shelf, chair back, or wall.
-
Let the paper curve gently onto the shooting surface. Do not crease it — the curve eliminates the visible horizon line between wall and floor.
-
Light the sweep evenly from both sides to avoid shadows at the curve.
-
Replace the paper when it gets dirty or creased. A roll lasts dozens of shoots.
How do you plan a shoot and manage files at scale?
A shoot without a plan produces inconsistent images and wasted time. The workflow below applies whether you are shooting five SKUs or five hundred.
Pre-shoot checklist
-
Clean and prep every product (lint roller for fabric, microfiber cloth for hard surfaces, steam for apparel)
-
Gather props and surfaces listed in the image brief
-
Mark tripod feet positions with gaffer tape so you can return to the exact same framing after moving
-
Mark product placement on the shooting surface with gaffer tape crosses
-
Charge batteries, clear memory cards, and confirm tethering connection if applicable
-
Check model release requirements if a person appears in any shot
Shot-list template
-
Hero shot (front, white background)
-
45-degree angle shot
-
Back or side view
-
Detail/macro shot (one or two key features)
-
Scale reference (in-hand or next to a common object)
-
Lifestyle shot (in-use context)
-
Packaging shot (if applicable)
-
360 frames (if applicable, 24–36 frames per SKU)
Time estimate per SKU: 8–12 minutes for a practiced shooter with a prepared setup. First few SKUs will take longer as you dial in the lighting.
File naming and folder structure
A consistent naming convention prevents the “which version is final?” problem. One reliable structure:
-
[BrandCode]_[SKU]_[ShotType]_[Version].[ext] -
Example:
NEC_SKU1234_HERO_v1.jpg
Folder structure: one parent folder per shoot date, subfolders by SKU, with separate subfolders for RAW files, edited TIFFs, and web-ready JPEGs.
Color reference workflow
Place an X-Rite ColorChecker or a simple gray card in the first frame of each SKU’s sequence. In Lightroom or Capture One, use that reference frame to set white balance and exposure, then sync those settings across all frames for that SKU. This eliminates color drift across a long shoot day.
Batching strategy
Group similar SKUs together on the same shoot day: all white-background studio shots first, then lifestyle setups, then detail macro shots. Changing the lighting setup between SKU types is the biggest time sink. Batch by setup type, not by product category, and you can cut setup time by 40–50% on a full-catalog day.
What does a basic editing workflow look like from import to export?
Editing is not optional, but it should be minimal. The goal is accuracy, not enhancement. A product that looks better in the photo than in person drives returns.
Six-step editing workflow
-
Import and cull. Bring all RAW files into Lightroom or Capture One. Flag the best frame per angle per SKU and reject the rest. Do not edit rejects.
-
Color correct. Use the reference frame (gray card or ColorChecker) to set white balance. Apply the same correction to all frames from that SKU using sync or copy-paste settings.
-
Exposure and contrast. Adjust exposure so the background reads as pure white without blowing out product highlights. Lift shadows slightly to reveal texture in dark areas.
-
Background removal and edge cleanup. For white-background shots, use the Lightroom masking tool, Photoshop’s Remove Background, or a dedicated tool like remove.bg. Clean up any fringing or gray halos around the product edge.
-
Sharpen and check texture. Apply output sharpening at a moderate level. Over-editing and aggressive AI smoothing can make product images look artificial and increases return rates. Preserve the fabric weave, metal finish, or leather grain — that texture is what convinces a buyer the product is real.
-
Export with presets. Save export presets for each platform so you never manually enter settings. One click, correct output.
Tool recommendations by budget
-
Mobile: Snapseed (free) for basic corrections on phone-shot images
-
Mid-tier: Adobe Lightroom Classic ($9.99/month) for batch editing and preset management
-
Studio: Capture One for tethered capture and advanced color grading
Export specs by platform
Amazon:
-
JPEG, minimum 1000px on the longest side, recommended 1600px or larger for zoom
-
sRGB color space
-
Main image: pure white background (RGB 255, 255, 255)
Shopify:
-
JPEG or WebP, 2048px on the longest side recommended
-
sRGB color space
-
Consistent aspect ratio across all product images (1:1 or 4:5)
Etsy:
-
JPEG, minimum 2000px on the longest side
-
sRGB color space
-
10 images maximum per listing
Google Shopping:
-
JPEG or PNG, minimum 100x100px (non-apparel), minimum 250x250px (apparel)
-
No text overlays, no promotional graphics on the main image
When to outsource editing
If you are spending more than 5 minutes per image on background removal or color correction, outsourcing repetitive edits to a specialist or an automated service pays for itself quickly. Batch background removal services typically charge $0.25–$2.00 per image. For a 200-SKU catalog, that is a fraction of the time cost of doing it manually.
What are the platform rules for Amazon, Shopify, Etsy, and social commerce?
Every marketplace has its own image requirements. Ignoring them gets listings suppressed or rejected. Getting them right improves CTR before you spend a dollar on ads.
56% of online shoppers cite inadequate imagery as the primary reason for abandoning a product page without buying. Platform compliance is the floor; conversion optimization is the ceiling.
Amazon
-
Main image: pure white background (RGB 255, 255, 255); product filling at least 85% of the frame
-
No text, logos, watermarks, borders, or props in the main image
-
No visible mannequin for apparel (ghost mannequin or flat lay required)
-
Recommended size: 1600px or larger on the longest side for zoom functionality
-
File types: JPEG, TIFF, PNG, or GIF
-
Up to 9 images per listing; use all of them
For a deeper look at Amazon image rules and how to maximize each image slot, the specifics matter more than most sellers realize.
Shopify and owned storefronts
-
Recommended: 2048px on the longest side for retina displays
-
Consistent aspect ratio across all product images (1:1 is the safest default)
-
WebP format for faster page load when your theme supports it
-
Alt text on every image for accessibility and SEO
Etsy
-
Minimum 2000px on the longest side
-
First image functions as the thumbnail in search; make it your strongest hero shot
-
Lifestyle and context images perform well in secondary slots for handmade and gift categories
-
Square crops display best in Etsy search results
Social and shopping channels
-
Instagram and TikTok: vertical (4:5 or 9:16) for feed and Reels; square (1:1) for grid
-
Google Shopping: no text overlays, no promotional graphics on the main image; clean product on white or light background
-
TikTok Shop and Instagram Shopping: lifestyle and motion content outperforms static white-background images in these environments
For platform-specific image best practices across Amazon, Walmart, and Shopify, the requirements differ enough that a single export preset will not cover all three.
Should you keep doing DIY or hire a professional studio?
The honest answer depends on your SKU count, your revenue per product, and how much your current images are costing you in lost conversions.
Cost bands
DIY:
-
Starter setup: $50–$100 one-time
-
Mid-range setup: $150–$350 one-time
-
Ongoing cost: your time (roughly 15–30 minutes per SKU for a practiced shooter, including editing)
Professional studio:
-
Per-image pricing: typically $15–$75 per final image depending on complexity and market
-
Per-hour pricing: $100–$300/hour for a photographer, plus editing
-
Full-catalog projects: quoted as a package; a 50-SKU catalog with basic editing can run $1,500–$5,000+
Break-even logic: if a product generates $500/month in revenue and better images lift conversion by 25%, that is $125/month in additional revenue. A $200 studio shoot pays for itself in under two months. For your top-revenue SKUs, the math almost always favors outsourcing.
Timeline expectations
-
Single SKU, DIY: 30–60 minutes including setup and basic editing
-
Single SKU, studio: 1–3 business days for delivery after the shoot
-
Full catalog (50+ SKUs), studio: 2–4 weeks from brief to final delivery, depending on complexity
Questions to ask a studio or agency before hiring
-
Do you shoot to platform spec (Amazon white background, correct pixel dimensions)?
-
How do you handle color management — do you use a ColorChecker or gray card?
-
What file formats and sizes do you deliver, and do you include RAW files?
-
What is your turnaround time from shoot to final delivery?
-
Who owns the image rights after delivery?
-
What is your QA process — how do you catch focus misses or color drift before delivery?
Practical rule: prioritize reshoots for your top-revenue SKUs first. A 20% conversion lift on a $10,000/month product is worth far more than the same lift on a $500/month product. Rank your catalog by revenue and work down the list.
For brands considering a managed creative relationship, examples of professional creative services show what a full-service studio delivers versus a per-shoot freelancer.
What are the most common DIY mistakes that hurt conversions?
Most product photography problems come from the same short list of errors. Fix these and you close most of the gap between amateur and professional results.
56% of online shoppers abandon a product page because of inadequate imagery. That is not a small UX problem. It is the single largest conversion leak most ecommerce sellers have.
The most damaging mistakes:
-
Mixed color temperatures. Daylight from a window plus warm overhead bulbs creates a color cast that makes whites look yellow or blue. Fix: turn off all ambient lights and use one consistent source.
-
Inconsistent scale across SKUs. A small product photographed close-up looks the same size as a large product photographed from farther away. Fix: use a consistent focal length and product-to-frame ratio across every SKU.
-
Over-editing that destroys texture. Aggressive skin smoothing tools applied to product images flatten fabric grain, leather texture, and metal finish. Fix: apply sharpening at output, not during editing, and avoid AI smoothing filters on product surfaces.
-
Visible seams and horizon lines. A crease in the background paper or a visible edge where the wall meets the floor reads as amateur. Fix: use a curved sweep and replace paper when it creases.
-
Cluttered props. Props that compete with the product confuse the eye and reduce conversion. Fix: one or two supporting elements maximum, neutral colors.
-
Too few angles. A single hero shot leaves buyers with unanswered questions. Fix: follow the minimum shot set for your price tier.
-
Low resolution. Images that pixelate on zoom destroy trust instantly. Fix: shoot at full resolution and export at 1600px minimum on the longest side.
Pro Tip: Mark your tripod feet and product placement with gaffer tape at the start of every shoot. When you move between SKUs, the tape brings you back to the exact same framing in seconds. This one habit cuts reshoots and keeps your catalog consistent across hundreds of products.
What are your next five steps to complete your first shoot?
Here is the complete action plan for your first publish-ready shoot. Follow these in order and you will have images ready for Amazon, Shopify, or Etsy by the end of the day.
-
Pick your top three SKUs. Do not try to photograph your entire catalog on the first shoot. Choose the three products that generate the most revenue or have the weakest current images. Practice on these before scaling.
-
Write a one-page image brief. List the mandatory shots (hero, angle, detail, scale, lifestyle), your lighting setup (light distance, Kelvin setting, reflector position), your export specs (platform, pixel size, format), and any banned props. This takes 20 minutes and saves hours of inconsistency later. A solid ecommerce photography approach starts with the brief, not the camera.
-
Set up lighting and background. Build your white sweep, position your key light at 45 degrees, place your reflector on the fill side, and lock white balance. Take one test frame and check it against the physical product before shooting anything for real.
-
Follow your shot list and camera settings. Shoot every mandatory angle for SKU 1 before moving to SKU 2. Check sharpness and histogram after the first frame of each SKU. Mark positions with gaffer tape. Shoot RAW.
-
Batch edit and export to platform specs. Import, cull, color correct from your reference frame, remove backgrounds, apply output sharpening, and export using saved presets for each platform. For a three-SKU shoot with five images per SKU, this should take 45–90 minutes in Lightroom.
Time expectations for early practice rounds:
-
Setup (lighting, background, sweep): 20–30 minutes
-
Shooting three SKUs at five shots each: 45–60 minutes
-
Editing and export: 60–90 minutes
-
Total first shoot: 2–3 hours
Day-of pre-shoot checklist:
-
Products cleaned and prepped
-
Background and sweep in place, no creases
-
Lights on, white balance locked, ambient light blocked
-
Tripod and product positions marked with gaffer tape
-
Shot list printed or visible on screen
-
Memory card cleared, battery charged
-
Export presets loaded in editing software
Key Takeaways
Lighting and consistency beat camera gear every time — a well-lit smartphone image outperforms a poorly lit DSLR shot on any marketplace.
Point: Lighting beats gear Details: Soft, diffused light from a window or LED panel is the single biggest quality driver in product photography.
Point: Build an image brief Details: A one-page brief covering shot types, lighting settings, and export specs keeps every SKU consistent and cuts reshoots.
Point: Shoot five image types per SKU Details: Products that display five or more image types convert at roughly 2.3 times the rate of listings with one or two images.
Point: Export to platform specs Details: Amazon requires pure white (RGB 255, 255, 255) and 1600px minimum; Shopify recommends 2048px in sRGB; each platform needs its own export preset.
Point: Nectar for managed creative Details: Nectar’s in-house creative studio handles photography, video, and platform-ready image production for brands ready to outsource.
What professional studios actually do differently
The gap between a DIY shoot and a professional studio output is not the camera. It is the system.
Professional teams lock visual standards before a single product is placed on the sweep. The image brief is not optional — it is the document that every shot is measured against. Color-check targets (a ColorChecker card in the first frame of every SKU sequence) mean that color drift across a 200-SKU shoot day is caught and corrected in batch, not discovered after the client reviews the gallery. Tethering means every frame is reviewed on a 27-inch monitor in real time, not on a 3-inch camera LCD after the shoot wraps.
The workflow discipline is what most DIY shooters underestimate. Dedicated shoot days, a fixed shot-list template, and a centralized asset library prevent the patchwork catalog problem that plagues brands who photograph products as they arrive rather than in planned batches. A studio does not just produce better individual images. It produces a catalog that looks like it came from one brand, shot on one day, by one team — even when it was shot over six months.
The QA routine is the last piece most people skip. Before any image leaves a professional studio, it is checked against the brief: correct background, correct crop, correct color, no visible seams, no props outside the approved list. That final check is what separates a deliverable from a liability.
Small teams can emulate this. The tools are not expensive. Gaffer tape for position marks, a ColorChecker for color reference, a shared folder structure, and a one-page brief per product line. The discipline is free. What it requires is treating photography as conversion infrastructure rather than a task you squeeze in between other work.
Nectar’s creative studio takes your product images further
If you have worked through this guide and realized the bottleneck is not knowledge but time or scale, that is exactly where a managed creative relationship makes sense.

Nectar’s in-house creative studio handles product photography, video production, and platform-ready image delivery for mid-market and enterprise brands selling on Amazon, Walmart, and Shopify. Every shoot is built around a platform-first image brief, shot to marketplace spec, and delivered with the color management and QA process described in this guide. The difference from a freelance photographer is full-funnel integration: your images feed directly into listing optimization, A+ content, and retail media campaigns managed by the same team.
For brands whose top-revenue SKUs are underperforming, Nectar’s approach starts with an audit of your current imagery against platform requirements and conversion benchmarks. From there, the creative team builds a brief, schedules a shoot, and delivers publish-ready assets across every channel you sell on. See how professional product photography translates directly into higher conversion rates. When you are ready to scale beyond DIY, explore Nectar’s full services and request an imagery audit.
Useful sources and further reading
The sources below are the primary references behind this guide. Use them to go deeper on specific topics and to stay current with platform rule changes.
-
ConversionStudio: Product Photography Setup Guide — the most practical equipment and setup reference for beginners; covers cost tiers, lighting setups, and camera settings in detail.
-
ConversionStudio: DIY Product Photography — cost comparison between DIY home setups and professional studio rates; useful for break-even analysis.
-
Online Store News: How to Build a Product Photography System That Converts — covers image briefs, batching workflows, and the Baymard abandonment statistic; the best single reference for building a repeatable system.
-
Online Store News: How to Master Product Photography for Online Retail — multi-image conversion data and catalog consistency guidance.
-
Clipping Area: Ecommerce Product Photography Guide — lighting guidance, over-editing warnings, and texture preservation advice.
-
Acquire Convert: Product Photography Equipment — gaffer tape and stage-mark workflow tips; practical for batching and consistency.
How to use these sources together: start with the ConversionStudio setup guide to build your equipment list, use the Online Store News system guide to build your image brief and workflow, and check the Clipping Area guide before you finalize your editing process. For platform-specific rules, go directly to the official Amazon Seller Central image requirements page and Shopify’s help documentation — those change periodically and the primary source is always more current than any third-party guide.
For brands building a long-term image operations plan, treat these references as a living library. Revisit the platform requirement sources every six months. Marketplace rules for main images, secondary image slots, and video requirements update regularly, and a suppressed listing from an outdated spec is an avoidable problem.
Recommended






























































.webp)